Monday, June 11, 2018

Mossy Socks


This pattern is knit from the toe up, using a turkish cast on. It is written using the magic loop technique because it is most familiar to me when it comes to socks.

Pattern Notes:
The top of the socks are worked in moss stitch which is a combination of knits and purls, you would definitely gain a better understanding of this pattern if you have worked this stitch previously.

Materials:
1 skein sock yarn
2.75 mm circular needles

Cast on 24  (12 on each needle)
Row 1: knit around
Row 2: (kfb, knit to last stitch on needle, kfb) twice
Repeat rows 1 and two until you have a total of 60 stitches around, 30 on each needle.
Row 3: (k1,p1) repeat until end of needle, knit until end of round
Repeat row 3
Row 4: (p1,k1) repeat until end of needle, knit until end of round.
Repeat row 4
Continue working rows 3-4 as previously worked for 56 rows. DO NOT COMPLETE THE 56th ROW.  Halfway through the 56th row is where you will begin working the heel. I will be using the Fish Lips Kiss Heel by SoxTherapist but any short row heel will do. You can buy the heel I used for $1 on the ravelry store. If you use the suggested technique for this pattern, you will need to knit the backside of the last row.
Row 5: (k1, p1) repeat until end of needle, knit until end of round
Row 6: (p1,k1) around
Repeat row 6
Row 7: (k1,p1) around
Repeat row 7
Continue working rows 6-7 as previously worked for 12 rows (or until desired length)
Work 2x2 ribbing for 8 rows

Bind off using any stretchy cast off (I used the half stretchy bind off, it provides less flaring while still being able to expand) weave in ends

Please let me know if you have any questions, either leave a comment under this post or message me on Instagram @createwithcassie

Thursday, January 18, 2018

Blossmopolis Blanket


I decided to make a blanket for me, myself, and I. I've never done that before! For this blanket, I used I Love This Yarn! in the color Blossmopolis, hence the name. Using a size J/6mm hook, I worked the triple crochet stitch until I got the length that I wanted. It's so simple and so cute! I love the colors!
This blanket is thick and warm and took about one week to make (thanks to the Grey's Anatomy binge-watching).
This is a short post because I don't exactly have a pattern to release for y'all, but thank you for reading. Happy Creating!

Saturday, April 15, 2017

Two Beautiful Crop Top Patterns


Look how cute, I love them so much! Let's just get straight into it, I'm too excited.
In the first picture, I am wearing the Tuskfin Crop Top by Amanda Luisa who, by the way, has a couple more patterns that are to die for! You can find it right here: Free Tuskfin Crop Top Pattern. I finished this project in a matter of hours so it is really quick. If you try this, I would suggest watching the youtube video that accompanies it where she gives you a step by step tutorial.. That will be linked on her page. It's super comfortable, I could sleep in it (probably will, let's be honest). I loved this pattern and if you make it, be sure to post on social media and tag her to show off your work.
In the second picture, I am wearing the Bea Crop Top by Girlie's crochet which you can find here: Free Bea Crop Top Pattern. I find it super cute and an added plus- they have another version of this as a bikini top. They have step by step instructions with pictures so the pattern is super easy to follow! My favorite part is the lace, so pretty.
Y'all, these are free. You have no excuse not to make them, you know you want to. They are both cute and customizable to fit pretty much any size. You'll love making them! Good Luck, lovelies!

Thursday, April 13, 2017

My Pattern Pouch


Okay, okay, I know what y'all are thinking- it's about time I post something new. You got me there. So here it is:
I made this a year ago so I don't have a step by step pattern for you guys, sorry. But I can tell you what I remember. To begin this pouch, I used a Turkish cast-on. The Turkish cast-on is in the round so in order to achieve the stockinette stitch, all I had to do was knit for a few rows. I did one by one ribbing on the inside so the edge wouldn't curl when I cast off and continued with the knit stitch on the outside. Then, I cast off the ribbed side to create the opening and left the other side on my needles. Now I'm knitting a flat piece. I continued with the knit stitch on both the right and the wrong side which, as you all know, creates a different look.
To make the button-hole, I simply put half of the stitches on a stitch holder and knit the other half. When that was at a good length, I worked on the other side and then knit them together. The sides aren't straight but, hey, it's functional.
I finished sewing the button and tying in loose ends. I apologize for the complicated instructions, please comment with questions because I'm sure you'll have them! Good luck!

Wednesday, May 18, 2016

Adult Sweater


I'm so excited! I made myself a sweater! It's about time. I used this pattern by Clare Lee: Brick Sweater.
The only difference was that I made it in a top-down raglan style because that's what I'm comfortable with. It was really easy to make it top-down raglan- when you do your original cast on for the neckline, join in the round. I found this pattern super easy and super fun! It comes with directions for several different sizes, Enjoy!

Wednesday, March 16, 2016

Lightweight Poncho Crochet Pattern


There are many poncho patterns out there but most of them are made to keep you warm. Coming from a place where it is hot most of the year, that isn't very useful. So, I found a poncho pattern that I really liked that was also lightweight. But The problem was you need to work it in the round which proved to be hard for me. Every time I tried to join the two ends, my chain would twist and it would make me so mad! After an hour or two of attempting this pattern, I decided it just wasn't going to work. So this pattern is worked in as a single "panel". As you would make a blanket. I thought that I might as well make this poncho 100% mine and create a whole knew pattern.

First, you chain an odd number of stitches. It doesn't matter exactly how many, you can completely customize this pattern.
Row 1- 2 sc in second ch from hook and in each ch across until last ch, 2 sc in final ch
Row 2-5- ch 1, 2 sc in next st and in each st across until last st, 2 sc in last stitch.
Row 6- *ch 5, skip one st, sc in next* repeat from * across
Row 7- *ch 5, sc in middle ch of the next gap* repeat from * across.

Repeat those seven rows until desired length and sc five final rows.
Before you cut the yarn,  fold the poncho in half and slip st the sides together. When slip stitching insert hook into the two sides at once and continue until you have seamed the whole project together. Flip inside out.

If you have any questions, be sure to ask me because I would love to answer them. Let me know how yours turns out!


Saturday, February 13, 2016

Knit Baby Sweaters


I have always wanted to make a sweater but was too scared because it looked too complicated. I didn't want to deal with the stress of it not working so that I had to keep starting over and over again. But after a while, I figured that a baby sweater would be a good place to start because they are small and if I messed up, it wouldn't be so bad to start over. Also, I had just bought a circular needle set so I was ready to break in those bad boys.
As you could guess, once I discovered the top- down raglan technique through YouTube, I figured it didn't have to be as complicated as I thought. This technique involves no sewing- just a simple pattern of increases and holding stitches for later. I wanted to find a baby sweater pattern at this point but every one of them looked a bit too complicated with pockets and buttons and hoodies and all that good stuff. I wanted to start small and simple and ease my way into this stuff. It may be cute, but its hard.
Then I found a sweater pattern generator- Sweater Pattern. All you have to do is enter the needle size you'll be using, your gauge, a chest measurement, and the type of fit that you need- snug, comfortable, or loose. Then you press submit and the whole pattern generates for you. Here was the data I put in:

Needle Size- US 6
Gauge- 23 stitches per four inches and 29 rows per four inches
Chest Measurement- 24 inches
Fit- comfortable

The pictures above show how they turned out. For my first sweaters, I'd say I'm pretty proud. The pink one is supposed to be a sweater dress for my soon-to-be niece. I think they are so cute and turned out pretty well! I really can't wait to see them on my niece!
If you try this, tell me how it goes!

Friday, November 27, 2015

Knit Socks


I finished these socks a while ago and I forgot to post about them. These were my first socks... and I didn't use a pattern. Which might have been a mistake but they turned out pretty good. I just looked up how to do a short row heel and did it but I screwed up and just started winging it from there.
I used worsted weight yarn as most people suggest for your first pair of socks. Sorry that I don't have a pattern for these because I was kind of just experimenting.

Friday, October 23, 2015

Crochet Christmas Trees!


I love these trees! I think the yarn that my mom picked out looks great for this project because the little shimmery bits look like ice on the branches. Although this pattern is by Red Heart (Red Heart Tree), I used  I Love This Yarn in three different colors that seemed the most Christmas-y. You can also find the altered pattern, that I used, on Crochet Crowd where he makes the trees look more ruffled and random: Crochet Crowd Tree. In the pattern, it tells you to put a bead in the top with a straight pin, but I decided not to. I think it looks good the way it is. Also, I had to hot glue the tops onto the trees so they wouldn't fall off and I think something like that is mentioned in the pattern. I really do love these trees because Christmas is probably my favorite time of year! Tell me how it goes if you make them!

Tuesday, July 7, 2015

Knit Baby Hats


Okay, guys. I finished these two hats and I have to say the gray one is my favorite. Like ever.
I JUST WANT TO SEE IT ON A LITTLE BABY!
I used the same pattern for both of these and it is available in several different sizes: Simple Hat. These are both newborn size but the gray one looks a bit smaller. I added the cable on my own so it was not part of the original pattern. The cable is six knits wide and they are separated by 3 purls. I only tested this on the newborn size so it might not work on the others. When I got to the decreases, I just started doing knits around with no purls because it was getting a little too complicated for my liking.
Although I really liked this pattern, the one thing that I would change is the decreases. It says to k2tog and then ssk but the ssk looks very crooked on mine. So next time, I think I am going to do two k2tog in a row. (Hopefully that's not a knitting no-no.)
Anyway, If you have any questions about the cable or anything just let me know and I will be happy to answer!

Wednesday, June 10, 2015

Newborn Cowgirl Outfit


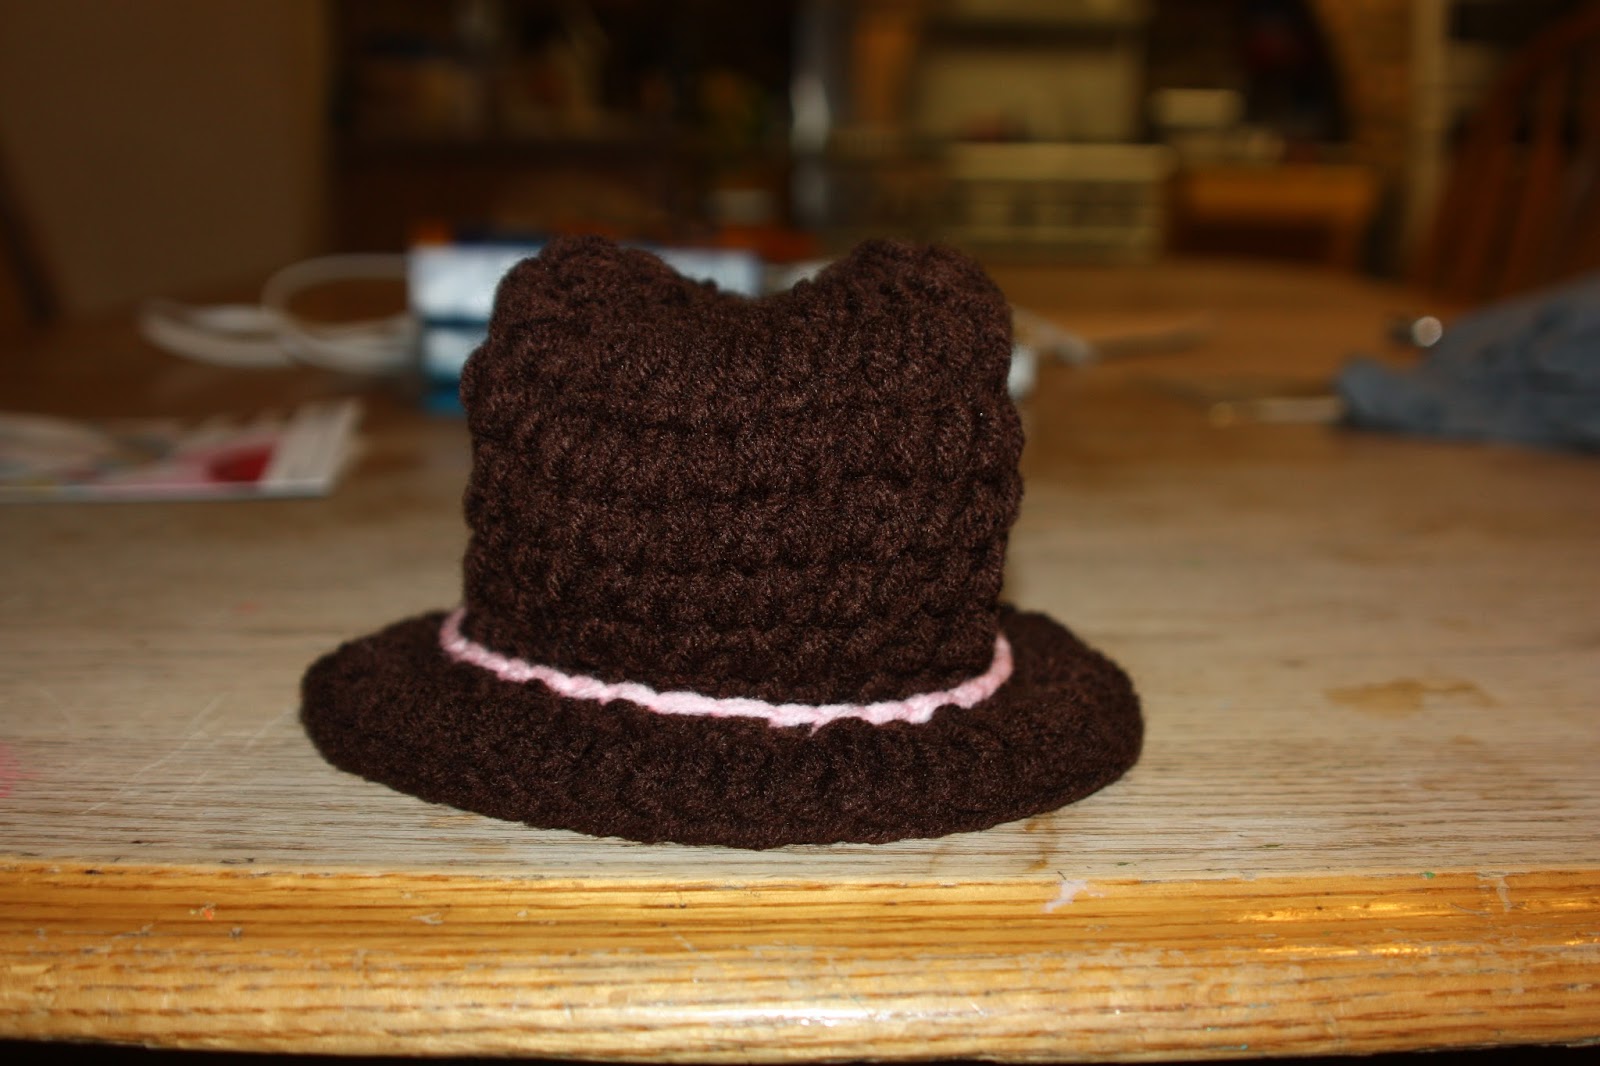
I found an awesome cowgirl outfit pattern that I am obsessed with! I used two seperate patterns-one for the hat and one for the outfit. The hat pattern was free: Cowboy Hat Pattern. But the outfit wasn't ): Cowgirl Outfit. I found it on Ravelry and I am so sad that I had to pay for it. I hate paying for patterns but I was getting desperate. I could not find another pattern as cute as this one.
All of the peices took me about a day each to make. The hat only took about five hours because it is so tiny and you work with two strands of yarn. Really, This project took less than two balls of yarn... so that's a win.
The one thing that I don't like is that there are alot of ends to weave in on the vest... and when I say "alot" I mean ALOT. I hate weaving in ends and if I never had to do it again, I'd be very thankful.
But I can't wait to see this on a baby girl. Really.

Tuesday, May 26, 2015

Flower Beanie


I made this hat just for fun.... because I bored. But I figured a hat would be fast and I could finish it quick so that once I found something really cool, I could do it.
Alright, pattern time! I used two different patterns, one for the hat and one for the flower: Beanie Pattern and Flower Pattern.
The button wasn't supposed to go in the middle of the flower but I had one that was the same size, so I added it.
Anyway, the hat pattern is available in several different sizes so you could make it for a newborn, too (which would make it even quicker.) I thought this was really cute and I could only imagine it on a baby or a toddler.

Saturday, May 2, 2015

Flower Headwrap


This is a really quick project, it only took me about six or seven hours in total. Now, the best part about this is that it buttons in the back. This is awesome! I don't know why, but when I button it, I feel so happy. It's really weird but it's true.
This is a free pattern download on Ravelry: Easiest Headwrap Ever
I love this thing so much! I won't be wearing it but hopefully I do one for myself soon. This one is for my sister who is heading to college and will be facing some pretty cold days.
Really, I think I am getting too attached to it even though I only held the finished product for less five minutes.

Wednesday, April 29, 2015

Proud to be a Texan Blanket


Most people you'll meet in Texas are very proud of the fact that they live in a huge state. What better way to show it than by making a Texas flag blanket?
I just finished this today and I am so happy! I didn't follow a pattern because it's really all about the proportions. It's just three rectangles and a star which is pretty easy to do. The star is simple because when you make a circle, it kind of turns into a pentagon so you would just put a point on each side. I used a pattern just as reference and here it is: Star Pattern. You can just scroll down on this website and you will find it. This website is not in English but there is an English translation for the star pattern under the original. This was way too big for the blanket which is why I just read it for the technique.
It's very simple, I alternated between double and treble crochet. The star and the border were both single crochet.
If you look closely, you can see some white and red under the blue. This is because when I was making it, I knew it was started to look like it had been stretched out, so I folded the blue over and sewed on.
As I said, I am so happy I finished this project! It was really fun and I love how it turned out!!!

Simple Knit Scarf


I know that this is a crochet blog and it will continue to be as such but I do a little knitting on the side and this was my first actual knitting project. It is just a simple scarf using the knit stitch that, to my surprise, only took one ball of yarn. I cast on 28 for this project which I think is a very good size for a scarf but you could probably get away with a little less than that if you wanted to.
The thing that I like about knitting is that it's more flexible and it tends to make yarn feel softer than when you initially feel it. I don't know how it happens but I'm not complaining.
There were two main reasons why I wanted to try out knitting.
1. I wanted to learn something new. The great thing for crocheters out there is that knitting won't be completely out of your comfort zone. But, it was pretty difficult for me to get used to holding two needles instead of one hook.
2. When I would go on Pinterest to find crochet projects for me to work on, knitting projects would come up that were cutest things in the world... and I couldn't make them. At all.
In the end, no matter how I make it, I love it when I finish a project that I worked so hard on and it turns out just as I imagined it.

Thursday, April 2, 2015

Tote Bag Pattern


I completed this just the other day. The bag itself probably took me about a week or something. (I don't really remember... whoops). But the straps and rings took about a week and a half to come in the mail.
I started this bag following a pattern but decided to freestyle it when I finished the bottom. Its pretty simple and only requires you to know a few terms.
Here's the pattern:
 Abbreviations:
mr= magic ring
st= stitch
sc= single crochet
dc= double crochet

Color A:
Make a magic ring, chain 1, single crochet 6
Round 1: 2 sc in each st around
Round 2: *2 sc in next st, 1 sc in next st. repeat from * around
Round 3: *2 sc in next st, 1 sc in each of the next 2 st. repeat from * around
Round 4: *2 sc in next st, 1 sc in each of the next 3 st. repeat from * around
Round 5: *2 sc in next st, 1 sc in each of the next 4 st. repeat from * around
Round 6: * 2 sc in next st, 1 sc in each of the next 5 st. repeat from * around
Round 7: * 2 sc in next st, 1 sc in each of the next 6 st. repeat from * around
Round 8: *2 sc in next st, 1 sc in each of the next 7 st. repeat from * around
Round 9: *2 sc in next st, 1 sc in each of the next 8 st. repeat from * around
Round 10: *2 sc in next st, 1 sc in each of the next 9 st. repeat from * around
Round 11: *2 sc in next st, 1 sc in each of the next 10 st. repeat from * around
Round 12: *2 sc in next st, 1 sc in each of the next 11 st. repeat from * around
Round 13: *2 sc in next st, 1 sc in each of the next 12 st. repeat from * around
Round 14: *2 sc in next st, 1 sc in each of the next 13 st. repeat from * around
Round 15: *2 sc in next st, 1 sc in each of the next 14 st. repeat from * around
Round 16: *2 sc in next st, 1 sc in each of the next in next 15 st. repeat from * around
Round 17: *2 sc in next st, 1 sc in each of the next 16 st. repeat from * around
Round 18: *2 sc in next st, 1 sc in each of the next 17 st. repeat from * around
Round 19: *2 sc in next st, 1 sc in each of the next 18 st. repeat from * around
Round 20: *2 sc in next st, 1 sc in each of the next 19 st. repeat from * around
Round 21: *2 sc in next st, 1 sc in each of the next 20 st. repeat from * around

Round 22: chain 2, dc in each st around, join
Round 23: chain 1, sc in each st around, join
Round 24-34: repeat rounds 22 and 23
Round 35: chain 2, dc in each st around, join.

Fasten off and connect with color B to the last slip stitch and continue with the pattern.

Round 36-49: repeat rounds 22 and 23
Round 50: chain 1, sc in each st around, join

Fasten off, weave in ends.
When attaching the rings, clip them onto the second Round of dc from the top. I have three dc in the rings to ensure that they will not mess up the stitching. Try to make the straps as evenly far apart on either side.

If you try this, let me know and if you have any problems, I would be happy to help!


Wednesday, April 1, 2015

Crochet Hook Case on Crochet Spot


I finished my crochet hook case a week or two ago but forgot to post about it, so here you go! As always, If you want to make this, here is the link to the pattern: Crochet Hook Case.
For the bow, it's supposed to be chains and not just a strand of yarn. I found that a strand works absolutely fine, though. When you have to attach the pocket to the back part of it, It says that you should sew it with a yarn needle but I see no problem in crocheting them together. I would have done it that way had I thought about it before I was finished.
As you can see, It is done in the shell stitch and each pocket is one shell. So, it fits most hook sizes. Of course, It wouldn't fit one of those ridiculously huge ones but my both my 10 and 11 mm hooks fit in and I bet it could go a little higher.
It's so nice to finally have somewhere to put them all. Before I made this, they were all in various places of my house. I swear that if you cleaned any room, you would probably find one of my hooks in a cabinet or under the bed. But thankfully, they are all in one cute, organized place now.

Thursday, March 19, 2015

Sea Otter Pattern on PlanetJune


I just finished this sea otter for my sister! She had a project at school that she needed to bring a model for and I found a pattern! Sadly, it did cost money because it's hard to find an otter pattern.
I just used a visa gift card to buy it from PlanetJune. If you want to make it yourself, here's the link to the pattern: Otter Pattern.
It didn't take me long at all. It only took my about a day but it probably helped that I had a deadline.
If you make this, let me know how it went!

Monday, March 16, 2015

Magic Cinderella doll

Magic Cinderella Crochet Amigurumi | Free Pattern for Transformable Doll

This is a pattern on Ravelry by Irene Kiss. You will have to make an account to get it, but the account is free, so why not?
Its a free pattern download, so If you want to make this doll, here is the link to the page where you can download the pdf in 4 different languages: English, Italian, German, and Dutch- Magic Cinderella Doll.
Remember that if you don't have an account it won't take you to that page, it will take you to the sign-up page.
I just thought this doll was really cute and a little girl would really enjoy it. If you want a different princess, I have found several pictures of an Elsa one but i can't seem to find the pattern. :(
Tell me how it goes if you make it!!!

Super Mario Afghan


Look at this afghan!!! Knowing how annoying it is to switch yarns, I don't think I would have the patience to do this. What makes it even more unbelievable is that it is all in single crochet. Do you have any idea how long this thing would take?! If you are willing to take the time to make this amazing project, here is the link: Super Mario Afghan. Maybe someday, I will become more patient and be able to do this... but i can't even wait three days for a package to arrive on my doorstep!
Anyway, if you make this, please let me know how it went and how long it took you!